
In April, I went on a little getaway to Maine to visit my pal Jill. It was the weekend of the Knit For Food Knit-a-Thon, and we decided to do it together! I’ll confess: we didn’t really knit for 12 hours straight like we were supposed to… that just wasn’t in the cards for us, ergonomically speaking. So we alternated our sessions with knitting-themed excursions, including a trip to Jill’s favorite LYS, Biddeford Fibre. (We also went to a cool knitting exhibit at the Saco Museum on the work of Jacqueline Fee… I’ll have to write about that in another post!)

The night I arrived, we gussied ourselves up a little bit and stopped by an art show where a friend was exhibiting. Jill wore a stunning cranberry-colored Camisole No. 10 that she knitted, paired with a mustard blazer, and I was floored by how amazing she looked! I don’t knit a lot of garments, mostly just socks, and I felt a touch of FOMO that I wasn’t wearing a handknit top too!
Meet the Yarn
When we went to Biddeford Fibre on Saturday, I must have had Friday night’s FOMO in the back of my mind. Normally, when I go to a yarn store, I make a beeline straight for the sock yarn section – which I also did that day because they carry Hedgehog Fibres yarn, which is a treat! I picked out two skeins of HHF, and, if I hadn’t been with Jill, I would have checked out and left the store, but she was browsing the other weights of yarn, and I wandered over to join her when I was drawn to this beautiful Eco Twist yarn by Queensland Collection:

The mix of colors is so perfect and it had a beautiful sheen to it. It contains recycled cotton and an eco-friendly viscose, which also appealed to me. (I delved into knitting with sustainable yarn earlier this year and loved the results!!)
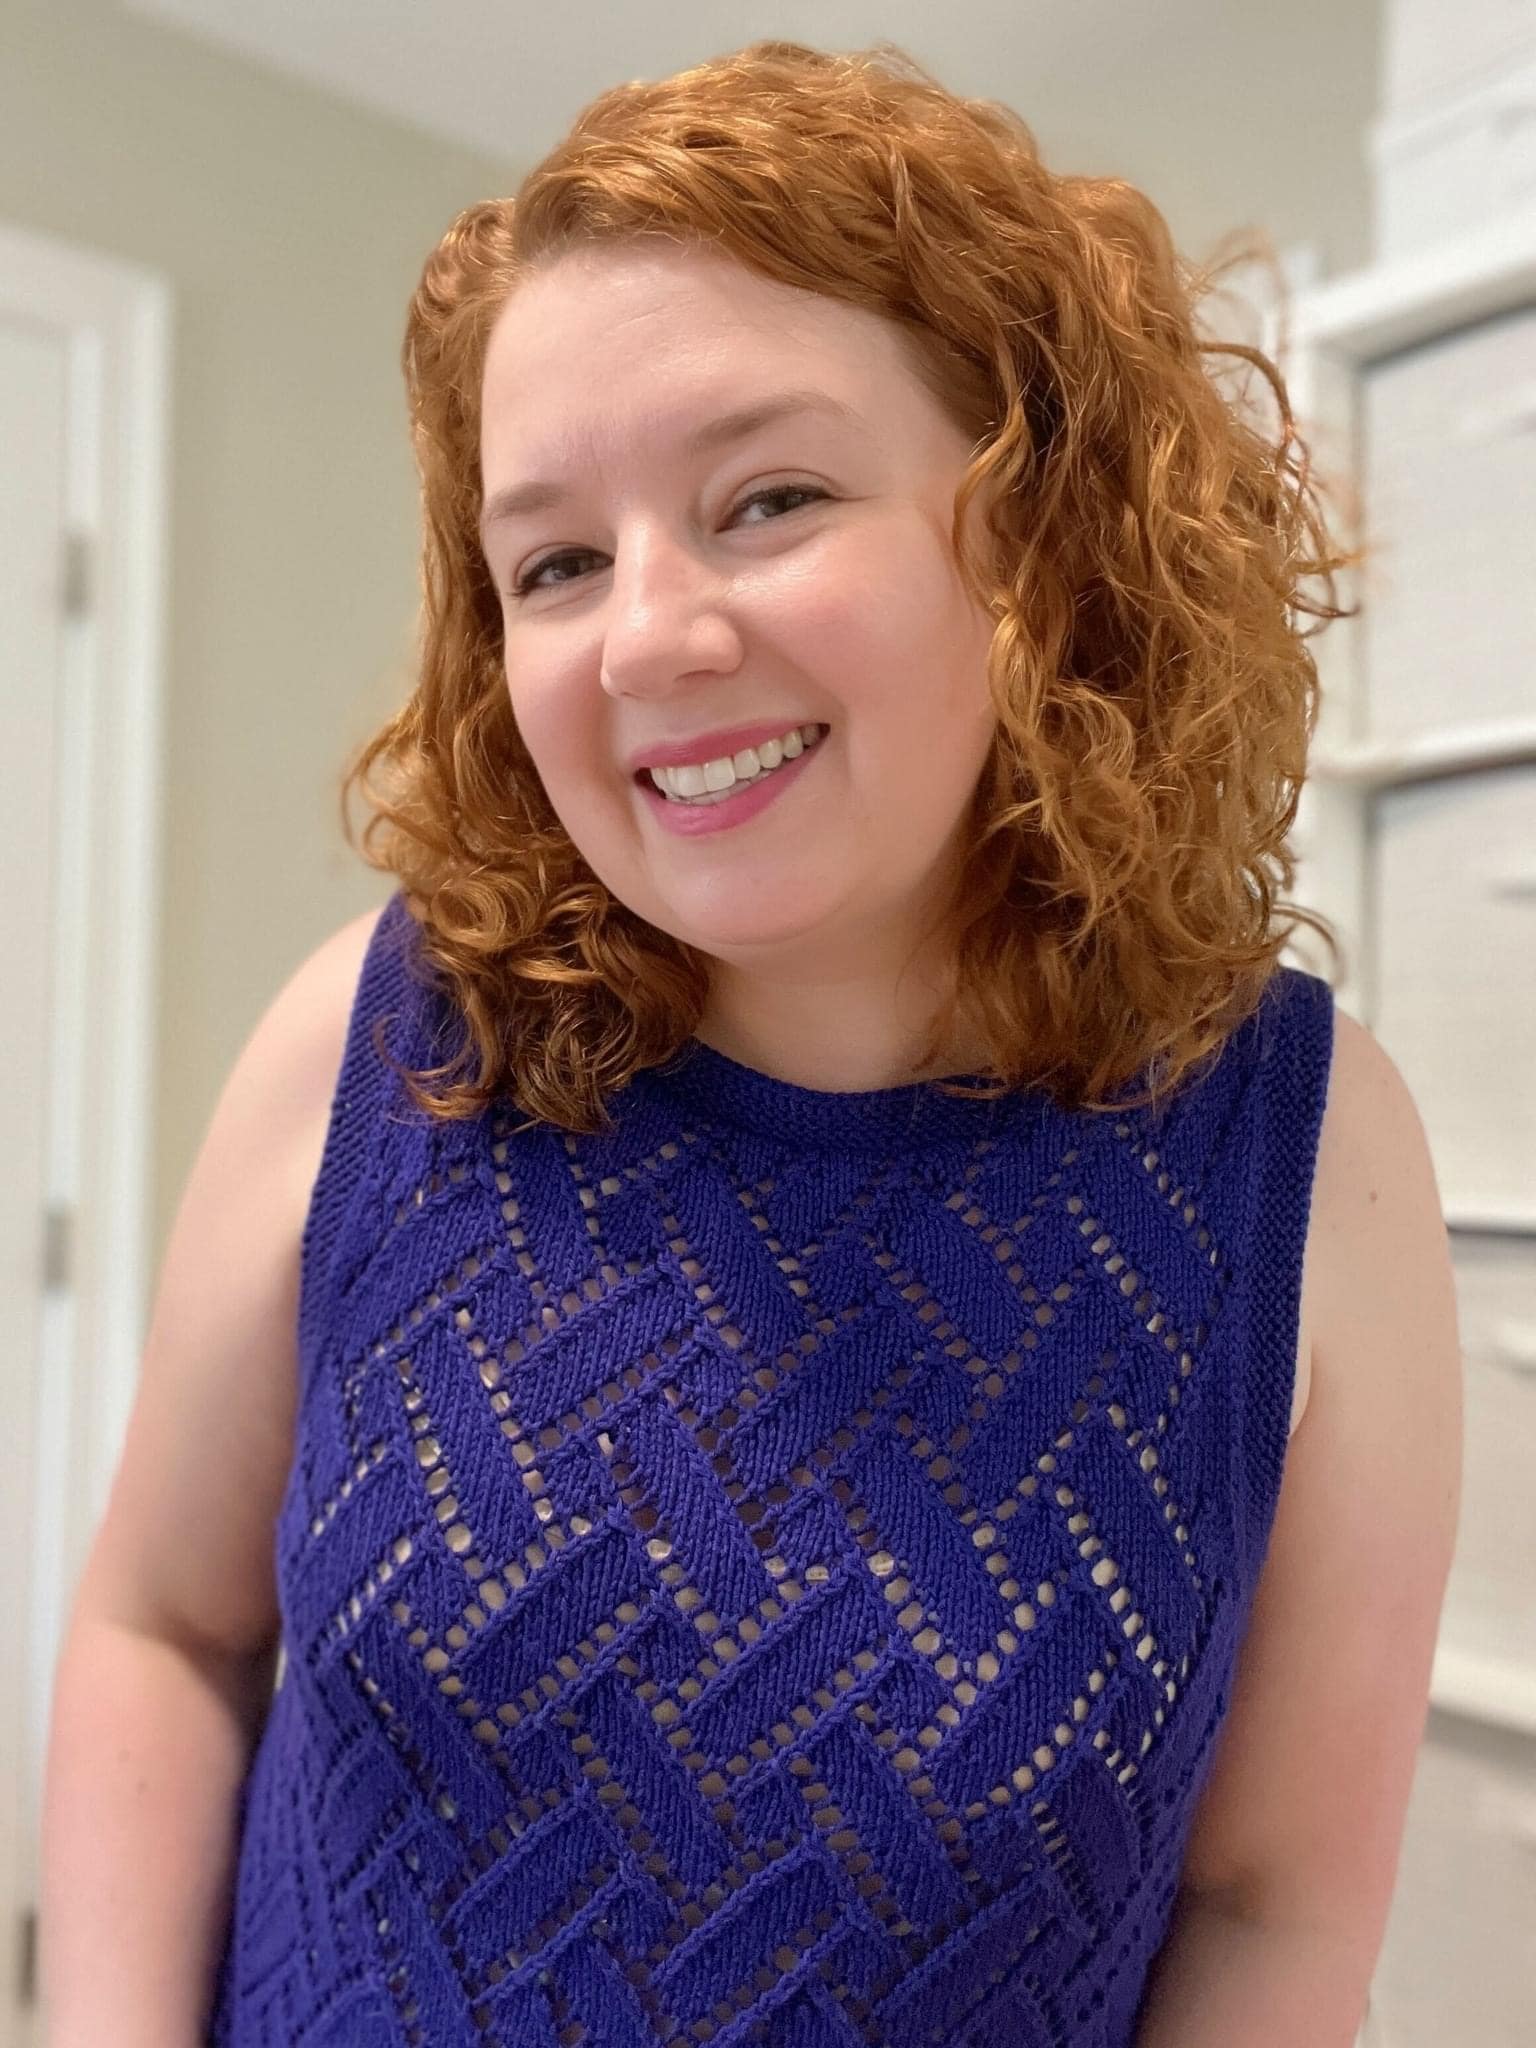
The yarn wasn’t cheap, but I calculated that I’d only need three balls to make the top Jill wore… so I splurged! (It turns out I only needed two balls! Could have saved myself $16! Darn!) The splurge was worth it, though! Check out how great this top turned out:

Camisole No. 10: Finish or Frog?
Obviously, the top turned out great, but I’ll admit that I almost frogged it mid-project. I didn’t fully realize that the yarn I chose was a thick & thin style. It made the fabric look a little uneven and I wasn’t in love with the look:

The thing that saved the top was that I popped it onto some stitch saver cord and gave it a try-on before making a decision to frog. I realized the fabric wasn’t as bad as I thought. Yes, it looked icky close-up from my vantage point while knitting, but when it was on my body and you are looking at it in the mirror from a couple of feet away, it wasn’t bad at all.
So, before I move on, here is a digression…
A Brief Ode to Stitch Saver Cord
As with many sweaters, you’ll want to use stitch saver cord with this project to hold the stitches when you split for the front/back and to allow you to try it on mid-project to check the length and fit. Stitch Saver Cord is the pink tubing you see in the pics below and it’s worlds better than using scrap yarn to hold stitches because you can hook it to the tip of your needle and slide the stitches on and off so easily:


In these photos, I’m using Purl Strings by Minnie & Purl. I picked them up at a yarn shop, but you can get them online on Etsy or at Jimmy Beans Wool (where I’ve linked here). They cost $16, and while I really like them, they’re definitely on the pricey side compared to some alternatives.
If you’re looking for a cheaper option for stitch saver cord, you can find spools of hollow rubber or PVC tubing (50+ yards!) at most craft stores for around $10. I’ve been using this 2mm tubing from Amazon, which comes with little toggle clips, so no need to tie knots in the cord like I did in my setup above. (Spoiler alert: I’d never done that before and the knots were a pain to untie!)
Some reviewers for the spool of tubing I bought mention that it has a strong smell, but I haven’t noticed any odor at all. I ordered the darker purple color (labeled “Mauve”), which is listed as synthetic rubber. I suppose it’s possible that other colors/materials are the ones with the smell. (Or maybe people just like to complain?)
FYI: There’s also a cheaper semi-transparent silicone tubing available, but… I wouldn’t recommend that material. It’s much stretchier than the rubber tubing, making it harder to use and pretty weak when stretched. Mine actually snapped mid-use on a project once, which was… not great.
Final Thoughts
And now, to finish us off, I’ll say that as cute as this top turned out, I don’t think I’ll knit this pattern again. I’m not happy with how deep the armholes are. Several people on Ravelry noted this same thing, and I tried to implement their modifications to shorten them, but I failed. I would love to knit a top in this style again, but there are tons of options out there, so I’d rather find a pattern that doesn’t need mods.
And, if I can complain just a little bit… I expected a $9 garment pattern to include a schematic drawing. I know it’s a small thing, but I was disappointed there wasn’t one because it would have helped me with the mods I tried to make. (In addition to the armhole mods I mentioned, I also attempted to knit this at a different gauge; notes below.)
But, despite my desire for a schematic, the pattern was well written. And, Jill has knitted a few Camisole No. 10s with no complaints, so don’t take my opinion as the final word! To each her own!
And now, the project notes:
yarn details
Queensland Collection Eco Twist in Electric Kiss
Sport Weight (thick & thin)
45% Eco Vera Viscose, 35% Recycled Cotton, 20% Natural Linen
Handwash, Dry Flat
100g / 273 yard balls
purchased in April 2025 at Biddeford Fibre in Biddeford, ME
project details
pattern: “Camisole No. 10” by My Favourite Things (purchase pdf pattern on Ravelry or on the designer’s website, as of 7/2025 the price is $8 on Ravelry and $9 on their website)
size knit: XL
needles: US size 6 (4.0 mm) 16” wood circs for cast on (from my shorty interchangeable set), US size 7 (4.5 mm) 24” wood circs for the body, and size 8 (5 mm) for the cast off – both from my Sunstruck Interchangeable set.
gauge: 17 stitches and 26.5 rows = 4 inches on size 7 needles in stockinette (with a little wiggle room due to the thick & thin nature of the yarn)
yarn used: 546 yards (200 grams) – exactly two balls!
finished size: hem to center of neckline: 19.5” & top of shoulder to hem: 22.5”; armhole depth (bottom of armhole to top of shoulder): 10.5”; bust: 38” (measured flat – 19” – at bottom of armholes); hem: 45” (measured flat – 22.5” – at cast off)
duration: April to May 2025
notes
- This pattern calls for DK yarn (or two fingerings held together) at a gauge of 18 stitches over 4”; my yarn was sport weight but very thin in some places and I didn’t like the way it looked at that gauge, so I did it slightly tighter at 17 stitches over 4”. I was between the L and XL sizes, so I knitted the XL at my new gauge. I did a bit of math, but more or less just went with the larger size and crossed my fingers. The pattern is designed to be worn with some positive ease and I never really know the best size to choose when that’s the case, so I didn’t want to overburden my brain. It worked out and fits great!
Leave a Comment