

Heads up! This post contains affiliate links which means I get may get a commission if you purchase something based on my recommendations here.
The sock pattern I use the most often is by far the Sock Surgeon’s Afterthought Heel, which is a bit more like a recipe than an actual pattern, but it was pretty life changing for me to add this technique to my sock-knitting arsenal. I always have a pair on my needles – it’s just stockinette knitting so the perfect brainless project to knit on the train or while engrossed in a movie. I always stock up on Felici whenever I place my Knit Picks orders to use for these socks. It’s soft and affordable! I love the heel for two reasons:
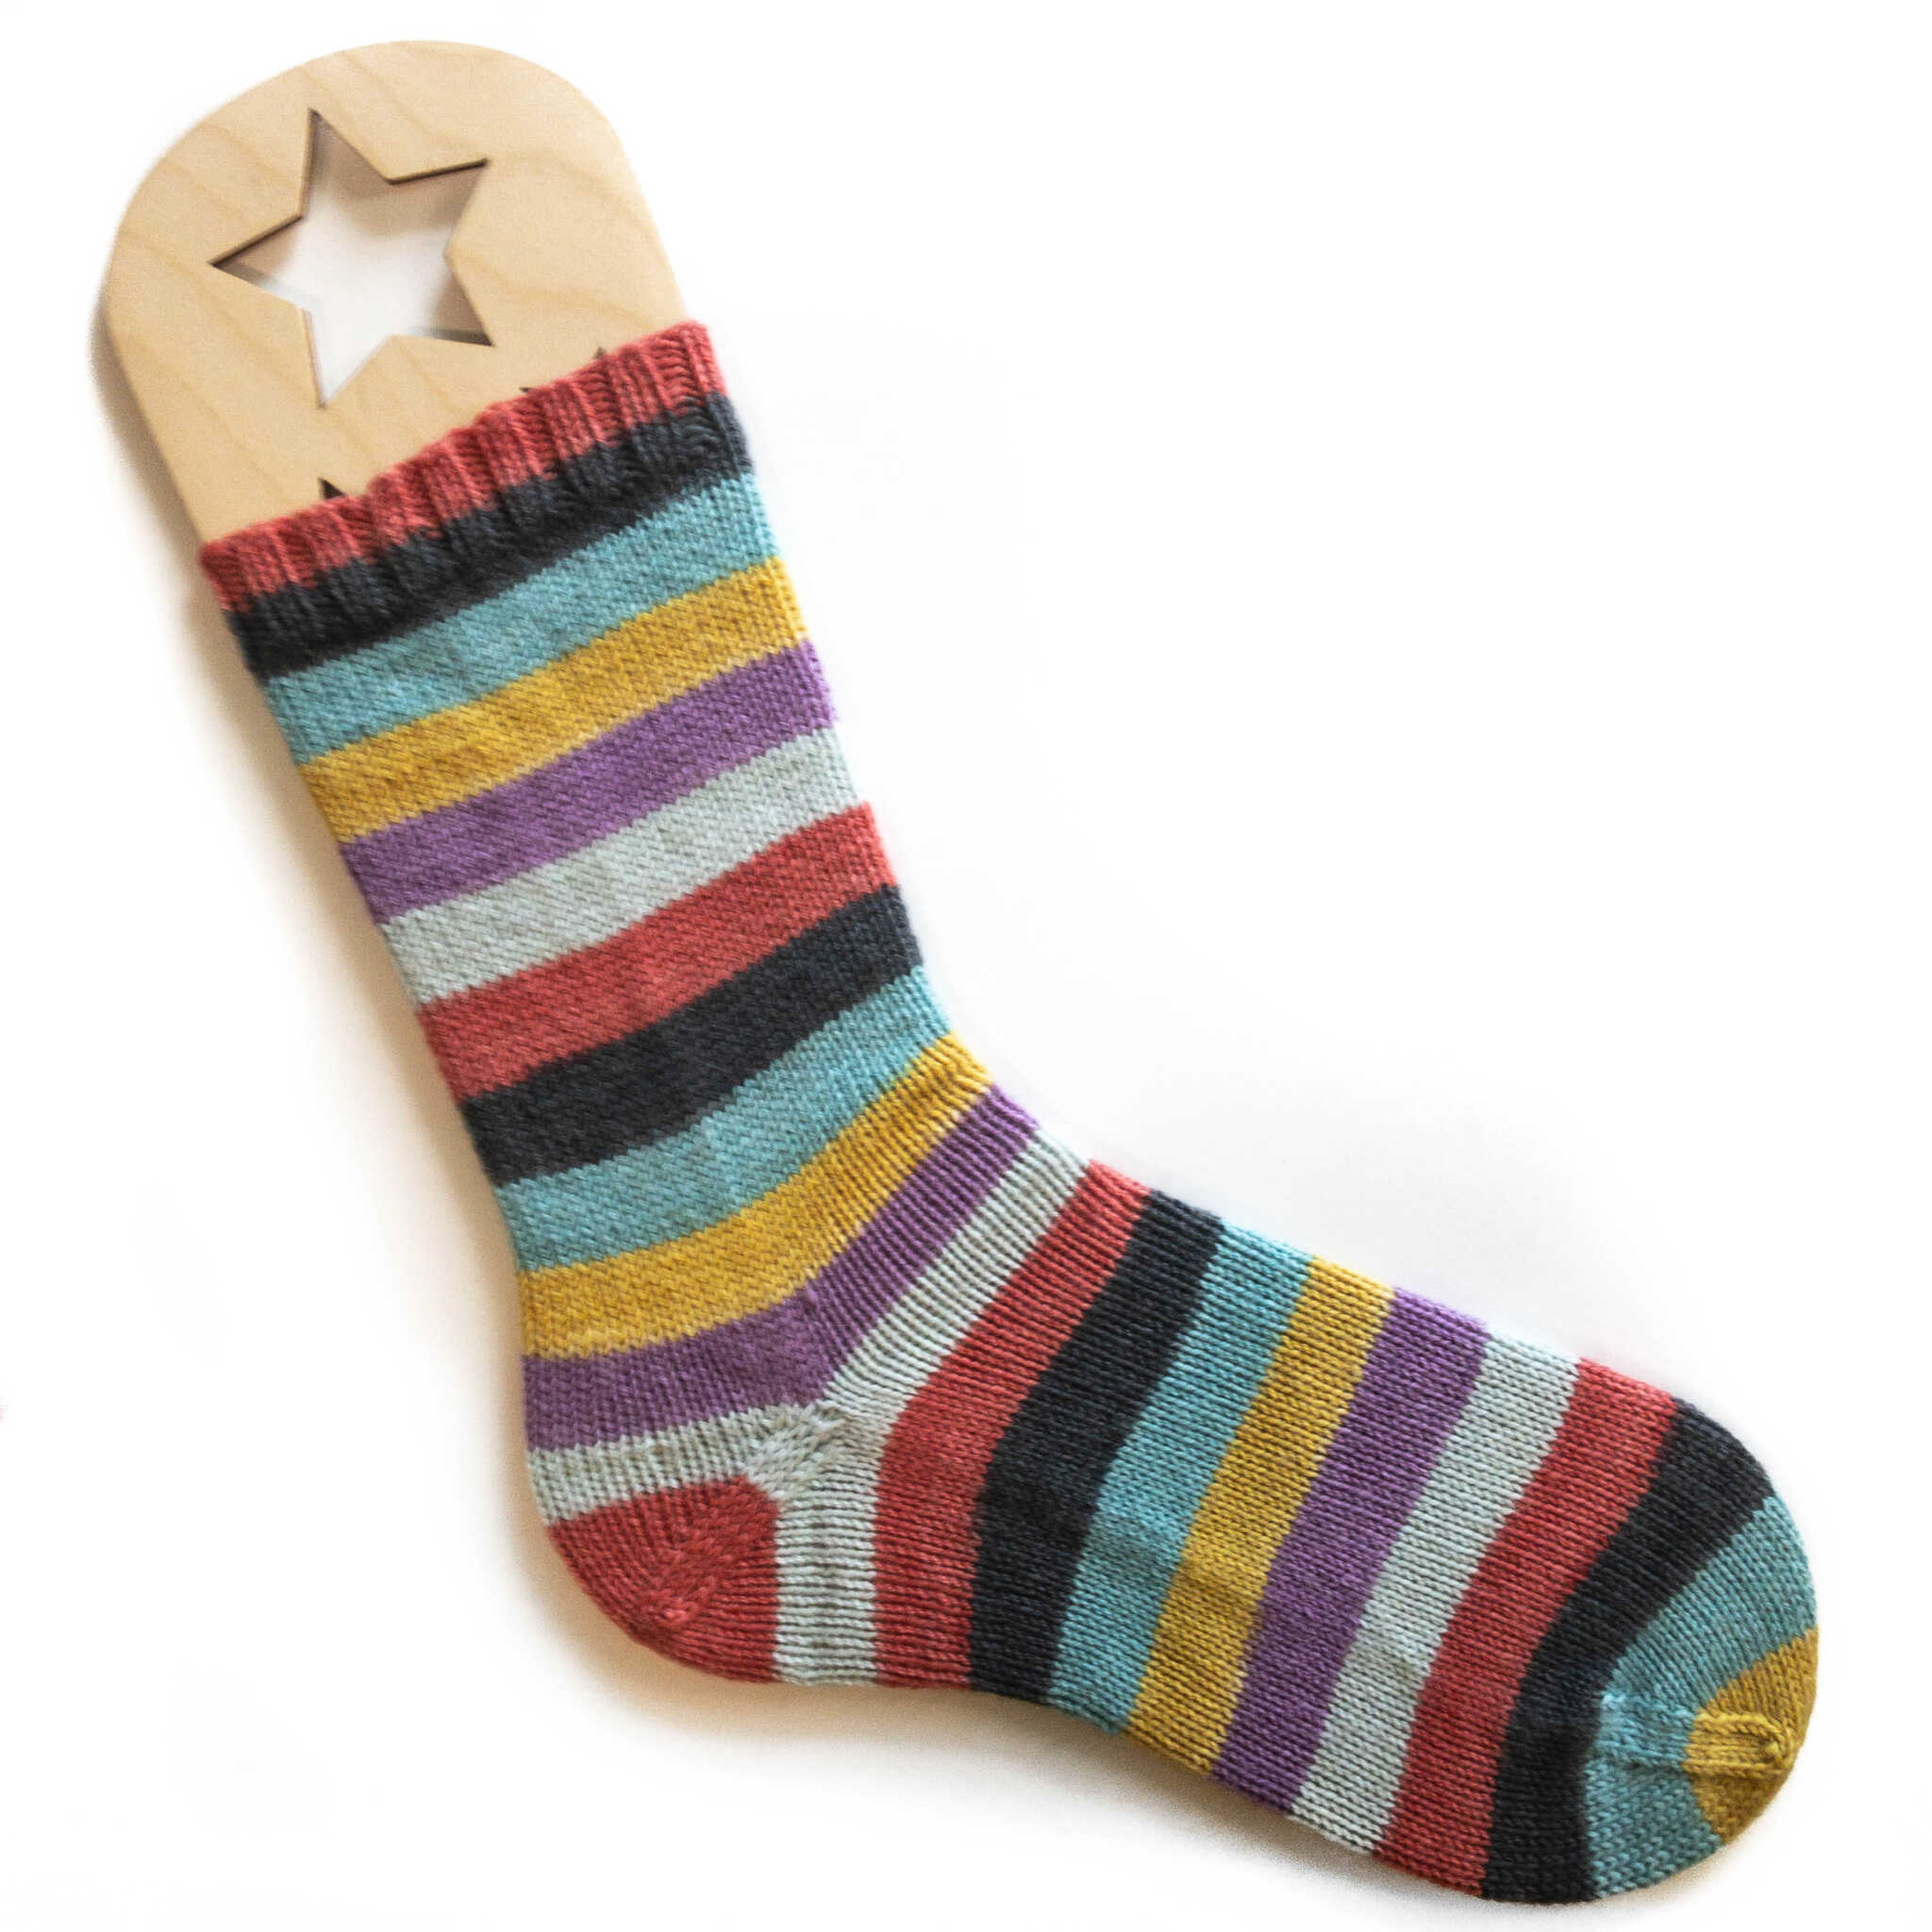
1. The stripe sequence of the self-striping sock yarn isn’t interrupted at the heel and it creates a cool bullseye-looking heel which I really like. (You’ll get this effect with any afterthought heel, so if the sock surgeon technique isn’t for you, check out an technique where you knit in scrap yarn where you’ll want the heel and pick it out later.)
2. The thing that is unique to this technique is that you can decide what size you will make the foot after you knit the sock – adding it in is a literal “afterthought.” This makes them perfect for gift giving. You can literally knit the entire sock, then get the foot size you’re after and pop in the heels in just a couple of hours. This makes them perfect for gift-giving.
In line with point #2 above, I knit this pair of socks to raffle off in a fundraiser and I was able to knit up the socks, find out the winner, and make them to fit. I added in the heels this weekend and snapped a few pics of the process and posted them in a knitting group on Facebook and it caused a lot of anxiety among my fellow knitters to see me cut into my knitting, so view the following photos with caution if you are squeamish… 😉
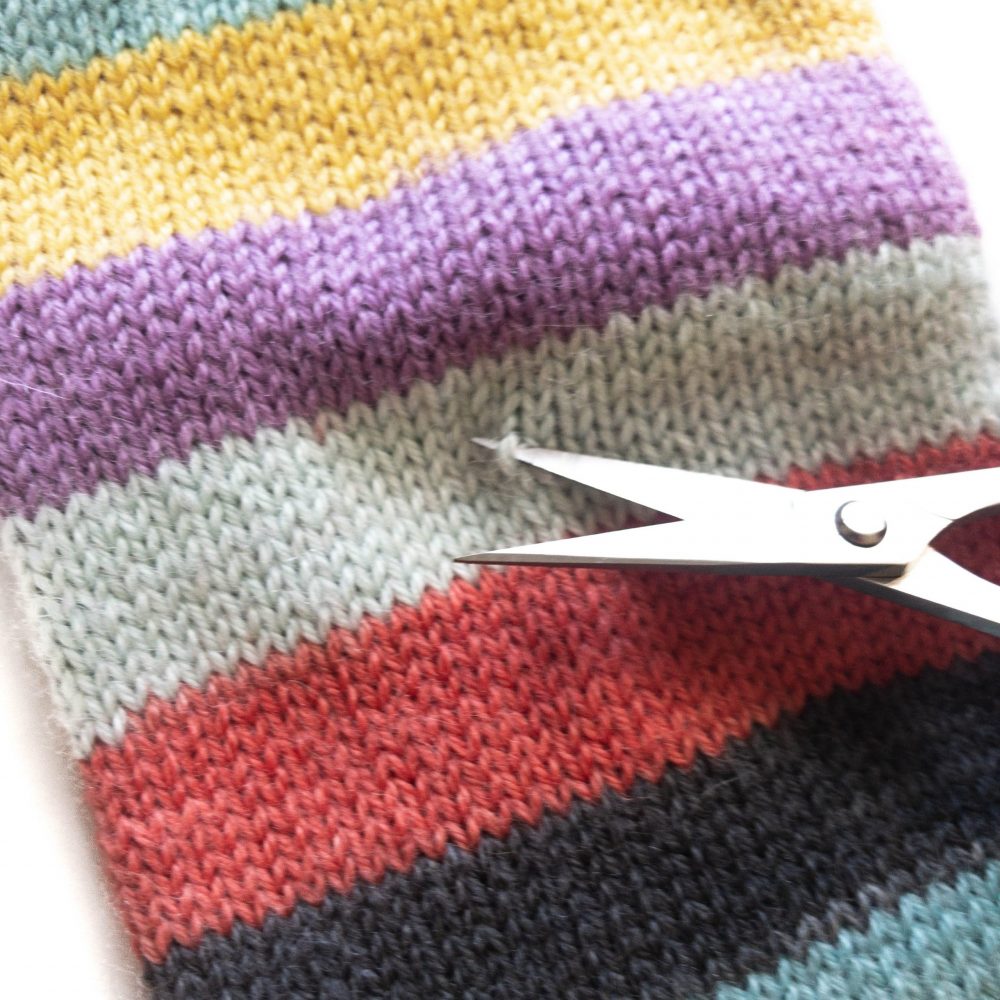
Here is me snipping into the sock — you just snip one leg of one stitch:
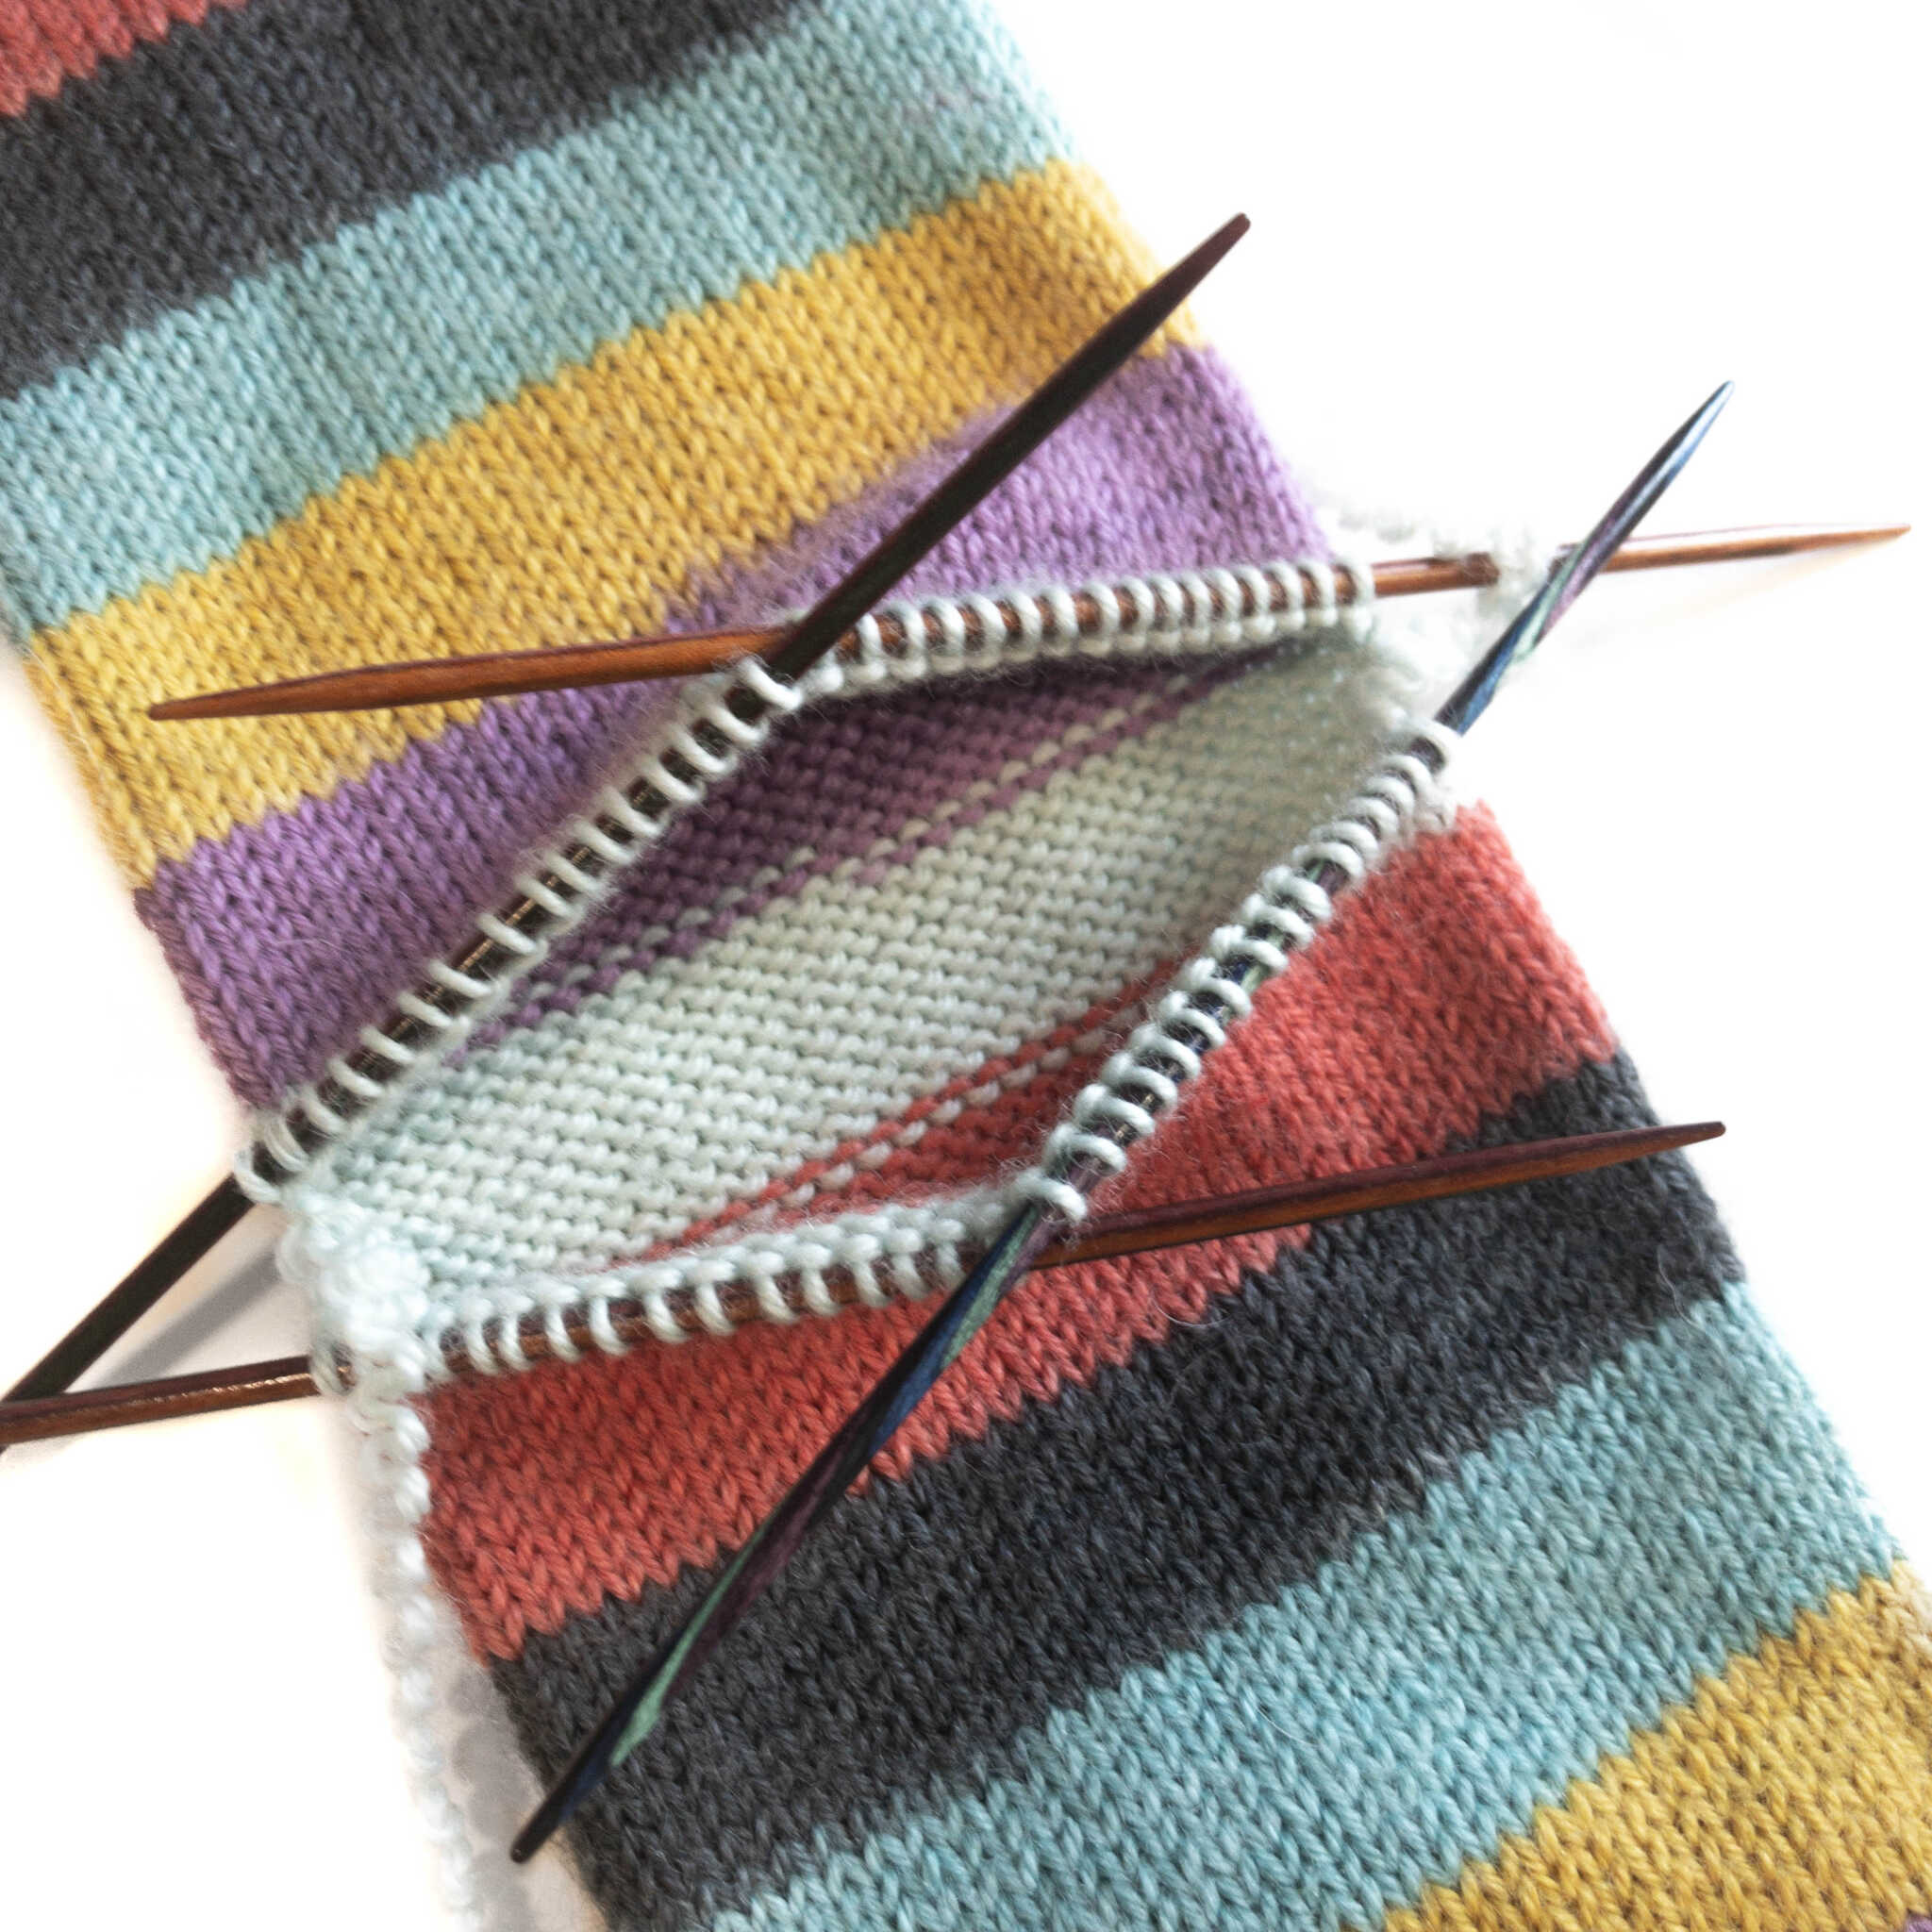
After snipping, you have to sort of unravel the knitted stitches one by one and add them to the needles when you get a live loop. A lot of people imagine that as soon as you snip into the knitting, it all starts to instantaneously unravel, which isn’t the case. You have a lot of control over the process. Here is a pic after just a few stitches are unraveled & picked up:

And here is the completed set up to start the heel. This is a 64 stitch sock, so I unravel until I have 32 stitches on the top and 32 on the bottom.
Then I just knit it exactly like you’d knit a toe. I like to decrease every other row to get from 64 stitches to 40 stitches, then I decrease every row until I’m at 20 stitches, then I graft with Kitchener. Voila!

Leave a Comment